|
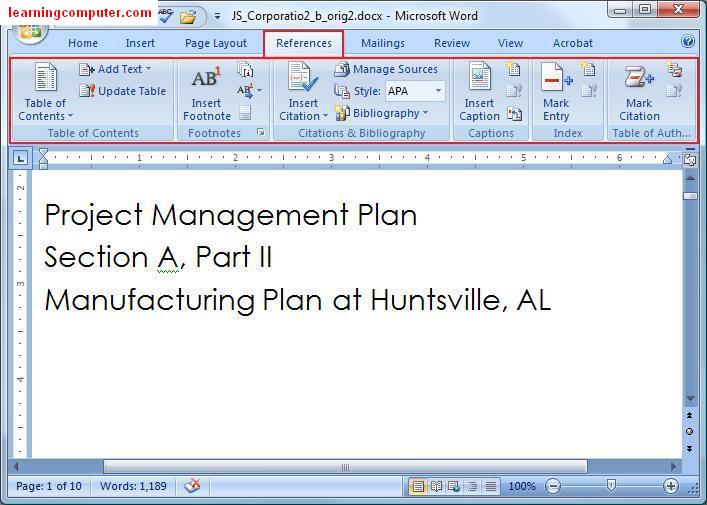
The
References Tab on Microsoft Word 2007's new ribbon offers a
quick way to enter your document sources, citations and choose
a style like APA, MLA etc. On the References tab you will find
things like Table of Contents, Footnotes, Citations &
Bibliography, Table of Figures, Captions, Indexes and Table of
Authorities.
Let us take a look at what the References Tab has to
offer. Here is a screen shot of what it looks like.
|
|
In Microsoft
Word 2007, creating a Table of Contents is really easy. One
thing you need to make sure is that you type your document
using one of the heading styles for the items that need to be
included in the Table of Contents.
Let me show you this
by example. For my project management plan report, I have created
nine different sections with Headings. However I have not
had the chance to create the Table of Contents just yet.
I will do that next. Click on the Table of Contents
command in Table of Contents group under the References
tab, then click on the drop down button.
It will give you built-in menu of options to choose from. From
that list, choose automatic table 2.
|

|
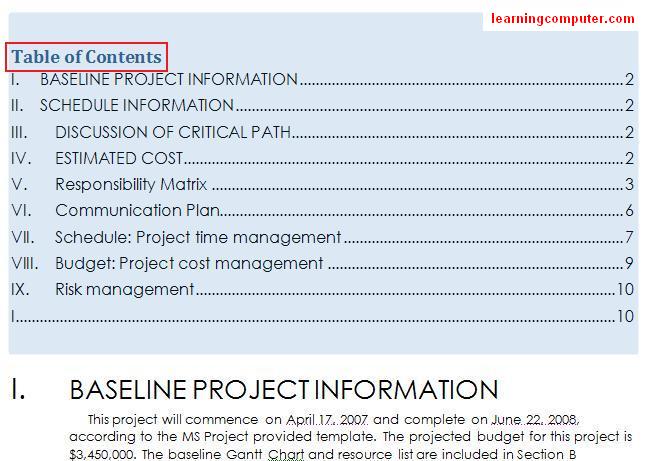
After I went
through the above mentioned steps, Microsoft Word 2007
generated a nice Table of Contents as shown below. Now when
you need to browse to a specific section, all you need to do
is Ctrl + click the section in Table of Contents and it will
take you there directly.
|
|
Footnotes
and endnotes are an easy way to direct the reader of your
document to supplemental information generally located at the
end of a page. You can insert the Footnotes and endnotes using
the Footnotes group in the References Tab. This is illustrated
below.
|

|
Let's say
I want to add a footnote in my schedule information on
Daw project plan report, something along the lines of an
estimated completion date. I select my insertion point and right
after section B and then click Insert Footnote. Word will add a
1 and then move the cursor to the end of the page. I then
insert my necessary text and that's it, we just inserted a footnote
to our page.
The
screen shot will explain this, the small red
rectangle is my insertion point and the large red
rectangle has the actual footnote text.
|

|
|
When your document contains
someone else's work, this typically needs to be cited for
reference. Adding such references enables the readers to
identify the source information. Using Microsoft word
2007, you can easily insert citations and references in your
paper. Let us review the steps involved in this process
next.
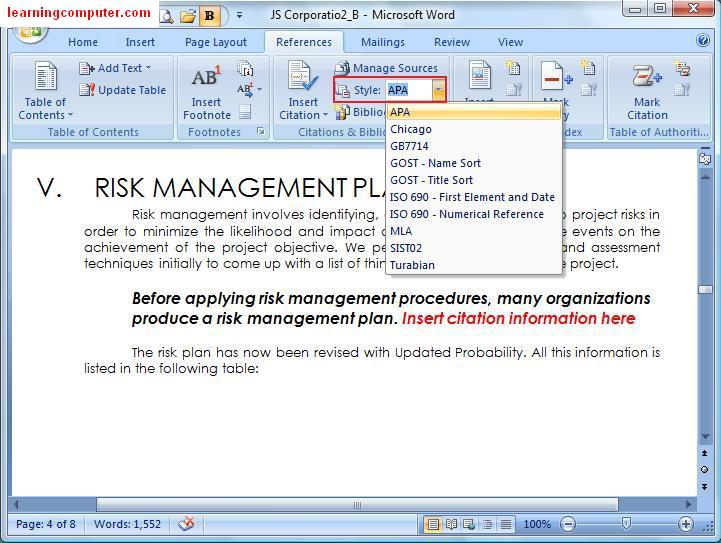
The first thing you need to do is select a
standard style for formatting your references. You can
do this by selecting the style command on the Citations and
Bibliography group in Word 2007. When you click on the
drop down, you will get a list of available styles.
We will choose APA for our citations as shown by the
screen shot below.
|
|
We will be adding citations to
the Risk Management Plan area. Notice in the screen shot
above, I have added the quoted text in bold. I have also
added the citation location indicated by red. Go ahead
and select Insert Citation command and then choose add new
source.
Here is what it looks like.
|

|
Microsoft word 2007 will launch
the Create Source dialog box as shown below. This is
where you will need to enter all the information regarding
your citation. As you can see, I have entered the
pertinent information including offer, title, publisher
etc. Finally I hit OK to close the dialog
box.
|

|
This will add an inline citation
right next to the quote and also add the reference to the
bibliography in our report. Notice in the screen capture
below, we now see the author's name in addition to the year of
the published book.
|

|
Next when I try to insert another
citation and select the insert citation command, notice that
the first citation is already included in the list. I
can use this one again for a separate quote as highlighted in
bold shown below.
|

|
I can also review all my sources
by clicking on the Manage Sources command and go in the
Citations and Bibliography group. You can organize the
list of sources, sort them by different filters and modify
them if you like.
Here is a screen shot of the
Source Manager.
|

|
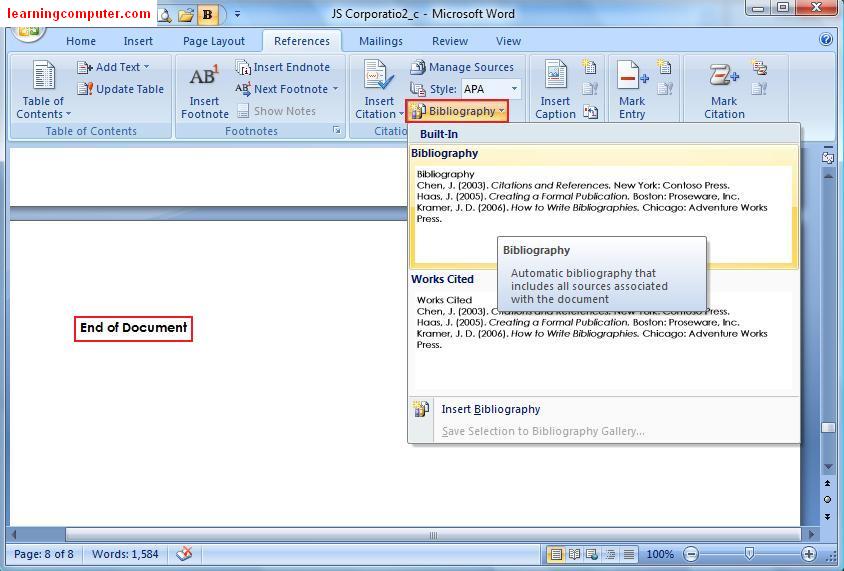
The last thing I need to do at
this point is to add the bibliography at the end of my document.
Let me show you how to do that. You can browse to the
end of the document and select the insertion point. Next
you need to select bibliography command as shown below.
You will need to select one of the built-in choices from the
drop down. Here we are selecting Bibliography.
|
|
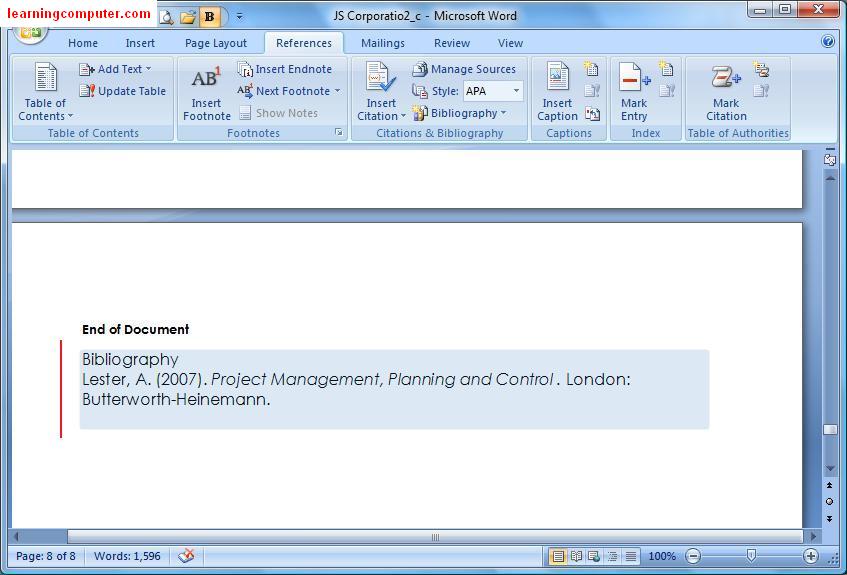
This will go ahead and add a
nice bibliography section to your document according to the
style you picked. We have shown the bibliography section
from our report in the figure below. Notice that it took
care of formatting and the order in which the different items
should appear, very cool indeed!
|
|
|
If your
report has a lot of pictures or figures in it, it may be
beneficial to have a Table of Figures in it. You can do this
by simply inserting a caption which really is a pointer to the
underlying object. My Project plan has at least two figures
that I would like to be part of a Table of Figures. So how do
I do that?
I select my first figure and then click on
Insert caption command in the Captions group in the References
Tab in Microsoft word 2007. Here is a screen shot of what I'm
talking about.
|

|
When I did
the above steps, I got the Caption dialog box. I went ahead
and entered some more textual information for figure one. In
this case I am calling it a Work Breakdown Structure (WBS)
which is a project management term.
This is shown
below.
|

|
I repeat the
above steps for the next two figures in my project plan
report, a Communications Plan and a Gantt chart. After I am
done, I click on Insert Table of Figures command on Captions
group.
This launches the Table of Figures dialog box
as shown below. I am going to leave the default settings and
click Ok.
|

|
This generated
a professional looking Table of Figures section in my
project planned report. From within the table of figures, I
can simply choose the figure and then do Ctrl + Click
to follow the link to the target object.
I have
included a screen capture for your review.
|

|
You can also
create an index using the Reference Tab. The index
includes list of topics in your document along with the pages
that they are on. You have to write the name and cross
reference for your index. We have included a screen
capture to show you how to insert an index.
|

|
Finally you
can make a list of all the cases, statutes and authorities in
your document. You can do this by inserting a table of
authorities. Here is a screen shot of what it looks
like.
|

|
This concludes the lesson
on References Tab in Microsoft Word 2007.
If you are unable
to find the information you are looking
for, please visit Microsoft's Word home
page
|
|
