
Microsoft Word 2013 Tutorial
A Useful Guide to MS Word 2013
In this Microsoft Word 2013 tutorial, we are not only going to highlight new important features of MS Word 2013 but also compare its functionality to existing version of Microsoft Office Wordd that are out there.
Being the foremost program for creating word documents since 1983, Microsoft Word is known for its diverse functions for enterprise and personal use. With updates in its features, editing tools, templates, and keyboard shortcuts, Microsoft Word 2013 is here, promising you a new experience when creating and editing documents.
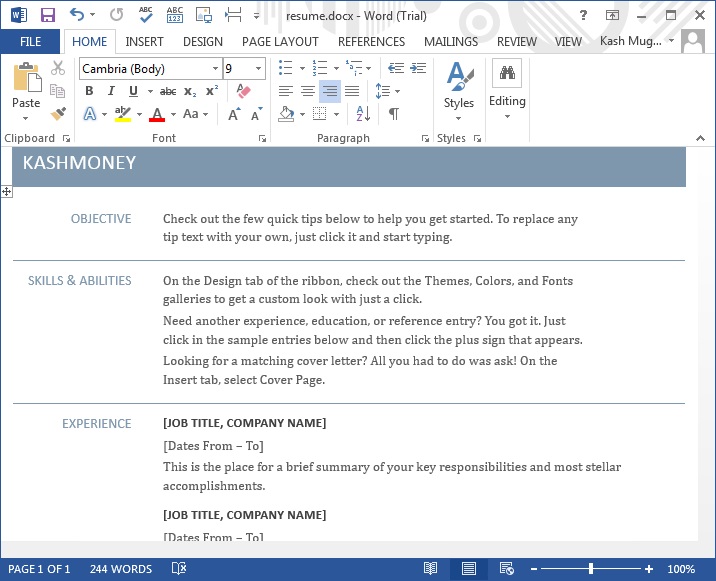
Our Learning Computer.com partner is offering Free MS Word 2013 tutorials that you can download for a week! In Microsoft Office Word 2013, they have improved the look and feel of the #1 selling word processing software. Here is what the new Interface looks like shown right below. As you can tell, it is definitely sleeker and modern looking.
If you are interested in Microsoft Word 2016, check out our Word 2016 Tutorial.
In essence, MS Word 2013 uses some basic components from Word 2010. Yet, it has enough new features to make it different than any other version of the program so far. Of course, you can opt for installing the classic menu for Word which uses the same interface as the 2010 and older versions if you are comfortable using it. This way, you can use the same display for Microsoft Word 2013. Hence, it is important to learn some basic guidelines for using MS Word 2013 with ease.
1. How to Make a Quick Start
Quick Access Toolbar
Quick Access Toolbar is one of the first toolbars you will see in your Word 2013 document. You can view commands in this version. Start off by using these commands. Right-clicking a command will help you add it to your Microsoft Word 2013 software.
There are different ways of customizing the Quick Access Toolbar. One way is to follow:
File > Options > Quick Access Toolbar
When we did that, we got the following screen capture. Now you are able to add and modify the default settings. The available commands are in the left pane, the ones on the right pane are already selected.

Ribbon Tabs
When you open a file in Microsoft Word 2013, you will see the Home tab. This Home Tab is a part of the Microsoft Office 2013 Ribbon which contains various other tabs such as Insert Tab, Page Layout Tab, and References Tab. Click on one of these tabs in MS Word 2013. You will see various commands and buttons for each tab. You can start off with your work accordingly.
Manage Your Files
This is an easy process. To open, edit, save, or print a file, simply click on “File” and you will see a list of options available in Word 2013..Btw the File Menu is also known as Microsoft Office Backstage view. Fancy name same functionality! You can start a New Office Word document, open or save an existing one. You can event print and export the
Word 2013 file to another format if your lil heart desires that.
Here is what is looks like for this tutorial on MS Word 2013:

Navigation Pane
If you want to organize your documents in a proper way, the Navigation Pane is of great help for you. Pressing CTRL+F will lead you to the Navigation Pane. You can use this pane for reorganizing a document. Drag the headings of your document into this navigation pane and complete your task.
Once you have opened the navigation pane, you will see a search box. Use it to find specific text quickly around longer documents. Furthermore, if you want to find a specific word from the entire document, press CTRL+H to use the Find and Replace option directly from your keyboard.
Contextual Ribbon Tabs
Some tabs will not be displayed directly unless your file requires them. For example, if you click on Table, only then you will be able to view the Table Tools, followed by extra tabs such as Layout and Design Tab. These are contextual tabs in Microsoft Word 2013 and appear only when you are doing a certain task or function.
Switch Views
At the bottom of the MS Word 2013 window, you will see small boxes from which you can switch views. Use them to switch your view to Print View, Web View, or Read View.
Need Help?
Press F1 if you need any help.
Minimize the Ribbon
The Ribbon can be minimized with a single click. Click on the up arrow on the ribbon bar to minimize the ribbon. Now, you will see its tab names only.
Zoom In or Out
You may want to zoom in or zoom out for better text readability. It is much easier with Word 2013. Just use your cursor to adjust the zoom level by moving the slider.
2. Getting Started with MS Word 2013
Using Microsoft Word 2013, you can get started by choosing the option that suits your writing and editing tasks the best. Since this version offers you several choices, select the one that is most appropriate for you.
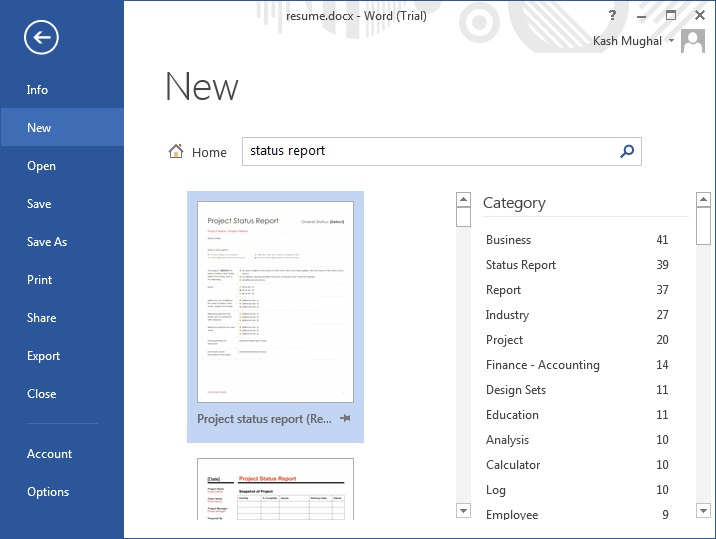
Search for Online Templates
If you want a variety of online templates, use the search box, type in keywords, and get templates online. Once you have typed keywords into the search box, you will be directed to Office.com.
My boss love status reports. No problem in Office 2013. You can easily go to the above mentioned site and search for “Status Report”. Here is what it looks like on our computer screen.
Suggested Searches
To make the template search easier for users, Microsoft Word 2013 has included additional words below the template search box. Click on any of the suggested searches such as Letters, Resume, Fax, Labels, Cards, and Calendar to proceed.
Featured and Personal Templates
Word 2013 provides a variety of templates for its users. You can get access to featured templates online, for example, from Office.com. link If you have made your own custom templates, click Personal templates.
Open Recent Files
When you are short of time, it is still easy to access the documents you edited recently. Simply click on Recent. You will get access to your recently edited documents immediately.
Open Other Files
You may want to have a look at previously edited documents for referencing purposes. In this scenario, Microsoft Word 2013 provides you a user-friendly way to get access to these documents in the shortest time possible. Simply click on Open Other Documents to browse documents you had created earlier on the computer or online.
Create a New Document
If you do not want any templates to begin your work, you do not need to go through the entire process of starting your work. Just click on Blank Document to start off on a new page.
Sign In (SkyDrive)
When you are about to get started and want documents you have saved online, sign in to your own SkyDrive account directly from Microsoft Word 2013. I have been using
this new feature for a while and love it. You can not only access your documents from anywhere in the world but also collaborate and work together on the same file! You will get access to your online documents directly.
In order to do this, you have to login to your SkyDrive account. If you do not have an account, register free at
How to Go to the Blank Screen Directly?
If you want to open a new document directly without opening an existing document, then simply open the blank document by pressing Enter or Esc.
3. How to Use the New Feature of Word 2013 Ribbon?
Microsoft Word 2013 has come up with its new feature in Design tab. This has enabled users to choose themes, formatting features, and design styles easily, while understanding their connection with one another. Though it is an advanced feature of Word 2013, you have the freedom to customize it according to your
editing needs. To do this, you can create new tabs and file them with the most usable commands. To start customizing these Ribbon commands, for this training step on Word 2013, just do the following:
Click File, then go to Options, and select Customize Ribbon.
4. Things You Might Be Looking for
Once you start using Microsoft Office Word 2013, you will notice that this new version also comprises of some common commands and tools, previously available in the earlier versions of Microsoft Word. However, make sure you use these options based on the following guidelines:
Word 2013 File tab – Use it to open, print, preview, save, protect, send, or convert files. In addition, you can also click on this File to save these documents to the internet.
Word 2013 Home tab – Format your document, change the style of text, or the line spacing using this option.
Word 2013 Insert tab – Insert tables, pictures, diagrams, headers, footers, page numbers, or hyperlinks by clicking on Insert, and then look for the desired option in the groups of tables, pages, illustrations, headers and footers, and links. This tab definitely has had a makeover, my favorite new features of Word 2013 included the ability to add:
- Online Pictures
- Apps for Office
- Online Video
We have highlighted these in the following screen capture.

Microsoft Word 2013 Design tab – Adding watermark into your document or simply changing its look can be done easily. All you need to do is to click on Design, and then choose Page Background and Document Formatting.
Word 2013 Page Layout tab – Specific documents such as newsletters and business reports require page breaks and margins. Go ahead with this task by clicking on Page Layout. Then go to Page Setup to set margins and add page breaks.
Word 2013 References tab – Working on annual reports has become easier with the referencing feature of Microsoft Office 2013. To use the same in Word 2013, click on References, and then Table of Contents, followed by Footnotes. You will see an organized report with the right page direction.
Microsoft Word 2013 Mailings tab – Though it is a specific option depending on its level of usage, it is not complicated. If you want to create labels or envelopes from Word 2013, Click on Mailings, and then on Create. You can also choose the option of Start Mail Merge when you are required to perform a mail merge.
Office Word 2013 Review tab – Review your work by clicking on Review. You will see numerous other options under this umbrella. Click on Proofing or Tracking to know the word count, track changes, and check grammar and spelling.
Word 2013 View tab – Sometimes you need to view the document in different forms such as print layout and full-screen reading. To do this, click on View, and then choose from the groups of Show, View, and Window.
5. Saving Files Online
One of the new features in MS Word 2013 is the ability to save your files online. As mentioned above, you can sign in using your Microsoft account.
For this, you need to have the SkyDrive app on your desktop. You can then access the Word files you have saved on your SkyDrive and make changes to them, which are synced right away.
Lets take a look at this option next in our tutorial on MS Word 2013. When you invoke the File Menu (Backstage View) explained earlier, you will get the following graphical image. Notice in addition to saving on the computer, now you have the ability to save to Cloud Storage directly from within Word 2013. How cool is that?? Now you can access your Word 2013 documents anywhere, anytime!

You can create a new Microsoft Word file in SkyDrive by simply saving it in the SkyDrive folder on your computer. You can clearly see that I have multiple folders in my SkyDrive. This also gives you the option for working in collaboration with someone else on the same file. Accessing the SkyDrive, two people can open the same Microsoft Word 2013 file and work on it simultaneously without any hassle. This is yet another way MS Word 2013 gives you another option to collaborate and work with others.
6. Adding Online Images and YouTube Videos in Word 2013
You can add online images to your Microsoft Word 2013 documents but more significantly, you can directly insert YouTube videos link into the open document. To add a video to the document, you have to click on Insert Tab on the Ribbon. Under Insert menu, you will find a Media tab. The Online Video option is displayed there. Clicking on the Online Video icon would open a popup window on the screen. By doing this, you get the chance to add any video you want to your document, provided you have the embed code for it.
Lets show you this in action. We would like to add a video of my favorite car, Porsche to our document. Don’t
worry I have the “Ultimate Driving Machine” aka BMW right now so not far off in the near future. How do we do that??
Go to the insert tab and do the following:
Insert > Online Video > Youtube
Enter the video you are searching for and hit Enter. When you find the desired video simply hit “Insert”.
For this MS Word 2013 tutorial step, here is what is looks like on our end with the steps highlighted in RED .

The popup enables you to search for videos on Bing or YouTube. Moreover, you can add videos through the embed code in MS Word 2013 if you know it. Otherwise, you can search for the video you want and embed it in the Word file. This gives you the option to any of the billions of videos currently posted on YouTube.There are multiple layout options which you can choose once the video has been added to the file. The options are fairly similar to when you add an image into a Word 13 file so you wouldn’t have much trouble working with it.
7. Print Preview
In Word 2013, the Print Preview and Print have been grouped in the same tab, Print. You simply have to click on File and select Print. You will see the Print Preview option there. Clicking on it will open the document in the Print Preview mode. In some instances, Microsoft Word 2013 will reduce the size of the document or font to show you a clear picture of how the printed version would appear. You can use the arrows at the bottom of the screen to increase the size if you are having readability issues.
8. Print
Simple Prints
Once again, you need to click on File and then select the Print option. When you do so, you will notice a counter asking you the number of copies you want to print of the document. This is pretty similar to the previous versions of MS Word so you should have much trouble understanding this. Simply select the number of pages you want printed and click on Print. Click the arrow at the top of the list of options to return to the original document.
Print Settings and Printing Selected Parts of a Document
Sometimes though, the printing needs in Microsoft Word 2013 are complex and require specific selections and settings. For this, you should select the settings. Clicking on the dropdown box of Print All Pages reveals the options you have for selecting a certain part of the text, for instance only track changes and comments. You can also use the familiar CTRL + P command for opening up the Print settings directly from your keyboard. It still works!
9. How to Work With People Who Do Not Have Word 2013 Yet
Opening Word 2003, 2007 or 2010 Documents in Word 2013
Even with the new and great features of MS Word 2013, some people are still apprehensive about giving up Word 2010 or even 2007 in some cases. They are comfortable using the older versions and don’t feel as though they have to change the version of MS Word they are using to get a better experience. You don’t need to worry about the people who are refusing to make the transition. You can do so and enjoy the diverse features and updates which have been made to Word 2013.
However, you may face some issues when you are required to work with people who don’t have Microsoft Word 2013 yet. It is possible for you to open a Word document created using an earlier version in Word 2013 but only in compatibility mode. This means that you won’t be able to use the new features of MS Word yet still be able to access the document and go through it if necessary. This is done to ensure the person who created the original document can still edit it if required in the older version.
Also, the layout and settings of the document remain intact. That means the font remains the same and other options as well even if you make changes. Of course, you can copy the entire text and paste it in a new Word 2013 document. However, this would make it difficult for the person not using Word 2013 to view and edit the document. The ideal solution is to convince the people you are working with to switch to MS Word 2013 and enjoy the great features it brings to the table. Compatibility Mode
The Compatibility Mode for MS Word 2013 enables you to view documents from versions going back to Word 1997. However, Word 2013 doesn’t specify which version of MS Word the document was originally created in. Sometimes, you might require knowing the version. Currently Microsoft Word 2013 offers compatibility in four modes:
- Word 2013
- Word 2010 Compatibility Mode
- Word 2007 Compatibility Mode
- Word 97 – 2003 Compatibility Mode
You can check the version of MS Word by clicking on File, selecting Info and then going to the Inspect Document section. Here, you have to click on Check for Issues and then select Check Compatibility. Then, click on the Select Versions to Show. You can see the checkmarks which appear next to the various versions to determine which one was used for creating the original document.
These are some of the basic guidelines you need to follow when using Microsoft Word 2013. Like all things Microsoft, you will become better at it as you keep using it! We hope you liked our Office Word 2013 training.
Useful links for Office and Word 2013 Training:
MS Word 2013 Training
How to Videos – Microsoft.com
What’s new in Office 2013
New features in Microsoft Word 2013
Dallas Web Design
This concludes the tutorial on Microsoft Word 2013. If you are unable to find the information you are looking for, please visit Microsoft’s Word home page.
Connect with US!
![]()