
Microsoft Office 2013 – Powerpoint Tutorial
How to Use Powerpoint 2013
Microsoft PowerPoint 2013 has become the software of choice when it comes to making presentations of any kind. Microsoft has mostly done a great job on the previous versions, and the PowerPoint 2013 retains many of the standard features, albeit they are easier to find and use. The focus this time is more on enhancing and reorganizing the traditional Power Point slideshow experience instead of simply filling the software with tons of features for the sake of novelty.
If you are interested in Microsoft PowerPoint 2016, check out our PowerPoint 2016 Tutorial.
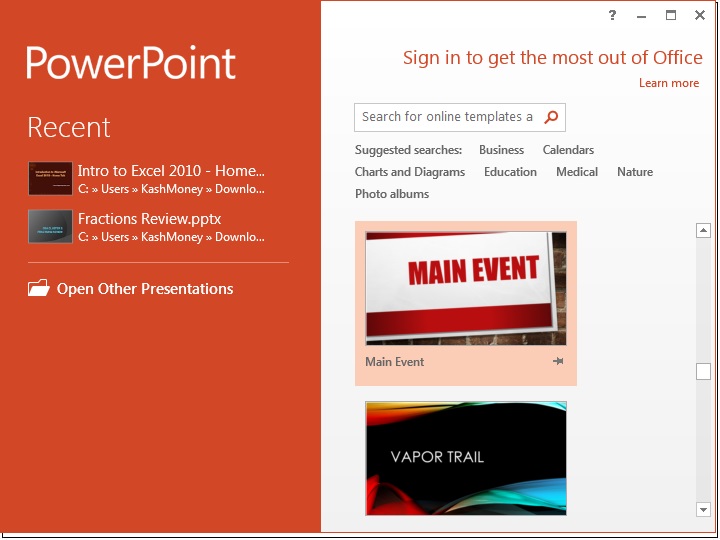
In this Microsoft PowerPoint 2013 tutorial, you will learn how to perform basic tasks on MS Power Point 2013, and how this version differs from its predecessors, especially the MS Power Point 2010 release. Here is what the new version of Office PowerPoint looks like:
Selecting a PowerPoint 2013 Theme
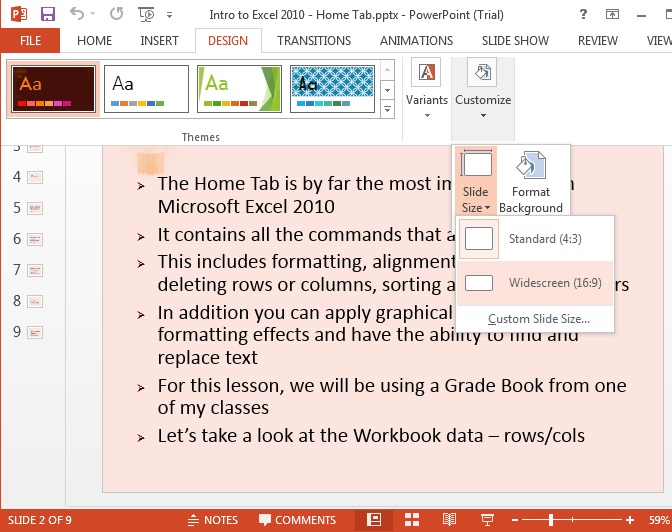
As with the other applications in the MS Office 2013 suite, the Microsoft PowerPoint has an all-new interface as shown above with an improved Start screen. In PowerPoint 2010 version, you were welcomed by the default blank screen, but this time the screen appears loaded with a variety of templates, including several default themes. Note that these new PowerPoint themes are suited for 16:9 (widescreen) and 4:3 (standard screen). To work on a specific theme, simply select it and click “Create”. Alternatively, you can select a color variation before clicking “Create”. If you want to convert to widescreen format, you can do the following:
Design > Customize > Slide Size > Widescreen
We have included a screen shot of this right below in our PowerPoint 2013 Tutorial.
Now, a word about the different sizes. MS PowerPoint 2013 takes into account the transition to high-definition screens in TVs and monitors and provides a default size of 16:9. This is a significant addition to the program and one that will stay relevant for a long time. To apply your screen preference, simply click “Slide Size” on the “Design” tab. Also note that when the software cannot scale your presentation on its own, it will display 2 options. You can either select “Maximize” to increase the size of your PowerPoint 2013 presentation or click “Ensure Fit” to decrease its size. Note that using the first option can also result in the content becoming too large for the screen.
Remember that these are not the only options for the PowerPoint slide size, for you can even adjust custom dimensions. Next in this PowerPoint 2013 training, we will show you how to do that. Simply try this:
“Design” tab and select:
Slide Size > Custom Slide Size
You can now adjust the height, width, and orientation in the “Slide Size” section of PowerPoint 2013. If you do not want to use the widescreen feature, you can set the 4:3 aspect ratio as the default size. Once you have set the screen to the 4:3 ratio, go to “Themes” on the “Design” tab and click “More”. Select “Save Current Theme”. In the section for “Filename”, type in the name of the theme and save it. Finish this process by right-clicking on this theme and select “Set as Default Theme”.
We are going to demonstrate how to use a new theme in this PowerPoint 2013 Tutorial. For new theme in MS PowerPoint 2013, try this:
Design tab > Themes group > Select a new Theme
We have included a screen capture of this right below to help you in learning MS PowerPoint 2013.

Modifying the PowerPoint 2013 Theme with Colors and Design
After choosing a theme and picking a color variation, you can change them on the PowerPoint 2013 “Design” tab anytime you like. Here is how you can do this.
Go to the “Design” tab and select the theme which has the font, color, and effects that you find suitable for a particular presentation. If you want to see how the slide will appear in the PowerPoint presentation, simply keep your pointer over the thumbnail of that theme to have a preview. If you want to change the theme, simply go to the “Variants” section to find a different color variation of another theme.
Creating, Organizing and Deleting PowerPoint 2013 Slides
Slides are the essence of PowerPoint presentations. That is why it is natural that while you are using the software, you will need to create, organize, and remove slides every now and then. Now in this PowerPoint 2013 Tutorial, we show how you can operate slides in PowerPoint 2013. You will find the slides in the thumbnail panel towards the left of the screen. Simply click on the slide that you like to work on. Next, go to the “Home” tab and select “New Slide”. You can also select the layout for your new slide in the layouts gallery.
Here are the steps:
Home Tab > Slides Group > New Slide
Here is what it looks like on our computer screen.

Now you have to organize the PowerPoint 2013 slides in the sequence in which they should appear in the presentation. Go to the panel on the left of the screen and select the thumbnail of the slide you want to move. Drag it to the preferred location. To move several slides, press and hold the Ctrl button as you select the slides that have to be relocated. Now you can drag them at once to their new place in the presentation. In case you want to the delete a slide, go to the same panel mentioned before, and right click on the thumbnail you want to remove. Select “Delete Slide” and you are through. The tips in this MS Powerpoint 2013 Tutorial will help you be efficient with Microsoft Office Power point 2013.
Adding and Formatting Text in the Slides
Next in this MS Powerpoint 2013 training, lets take a stab at Text enhancements. On your themed slide, click anywhere inside the text placeholder and start typing as you would in any PowerPoint version. To access the formatting options, highlight the specific text and go to “Drawing Tools”. Select “Format” to access multiple formatting options. For instance “Text Fill” in PowerPoint 2013 allows you to change the color of the text. On the other hand, if you want to add a color outline to the text, click “Text Outline” and then select your preferred color. Not to mention, you can add several effects to the text, such as glow, shadow, reflection, 3-D rotation, and bevel. Just click on “Text Effects” to add any of these effects in your PowerPoint 2013.
Alternatively, you can the change the color by highlighting the text and clicking “Font Color” on the mini toolbar that comes into view. Click “More Colors” or “Custom” to add other colors. If you want to change the color of the text on more than one side, click “View” followed by “Slide Master”. The changes made to the Slide Master will reflect on all the Office PowerPoint 2013 slides (more on this below). Go to left thumbnail panel and select a layout that contains the text on which the color needs to be changed. Next, highlight the text on the layout that needs to be changed. The mini toolbar will once again come into view and you simply have to click “Font Color” and select any color for the text. Once you are done with this, select “Close Master View” to resume working on your PowerPoint 2013 presentation.
Moving on with learning PowerPoint 2013, you may also have to change the font on one or more slides throughout the slides. The font list can be found in “Font” on the “Home” tab in Office PowerPoint 2013. There are 2 ways in which you can change the font on a single tab. You can highlight specific portions in the text or select the entire text in the placeholder (or by clicking the placeholder). To change the font for the remainder of the presentation, you need to make changes in the slide master. Once you select a slide master or layout that contains the font of your choice, click the portion of text that you want to apply the font change to. On the “Slide Master” tab, go to the “Background” section and select “Fonts”.
PowerPoint 2013 Shortcuts
Although PowerPoint 2013 controls are designed in a way to help users when they make and give presentations. However, shortcuts always come in handy.
To help you with learning PowerPoint 2013, here is a list of shortcuts that you can use in the new MS Office 2013.
- To launch the slideshow, press F5
- To go to the next slide, press N
- To go to the earlier slide, press P
- To locate a particular slide, type the number of that slide and press Enter
- To go to the next hidden slide in PowerPoint 2013, press H
- To execute the next animation press Enter/Page Down/right arrow/down arrow/spacebar
- To play the earlier animation, press Page Up/left arrow/up arrow/Backspace
- For a black screen, press B
- For a white screen, press W
- To display a pen cursor, use the combination Ctrl+P
- To display an arrow cursor, use the combination Ctrl+A
- To hide the cursor from view, use the combination Ctrl+H
- To end the slide show, press Esc
Related learning resources on MS PowerPoint 2013
– Powerpoint 2013 Tutorials – Microsoft.com
– Good overview of new features in Office 2013
– PowerPoint Video Courses and FREE Tutorials from Lynda
– Free Powerpoint 2013 training
The Slide Master in PowerPoint 2013
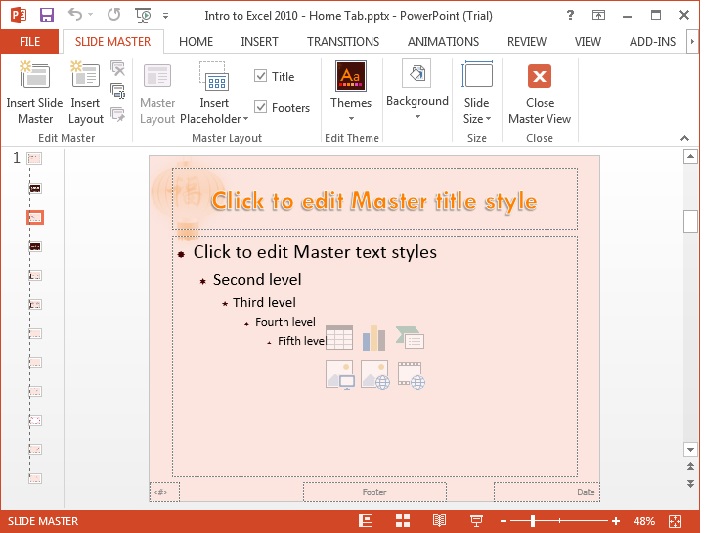
It is recommended that you edit your PowerPoint 2013 slide master before your create individual slides if you want to follow a fixed format for the entire presentation. So by modifying the layouts and slide master in “Slide Master View”, you can make widespread changes to all your slides. Not to mention, when you are making changes in the “Slide Master View”, other people working on the same presentation cannot edit or delete your modifications.
Here is what Slide Master looks like in our PowerPoint 2013 Tutorial.
With that said, we will now proceed towards other impressive new features of the MS PowerPoint 2013.
Online Presentations in PowerPoint 2013
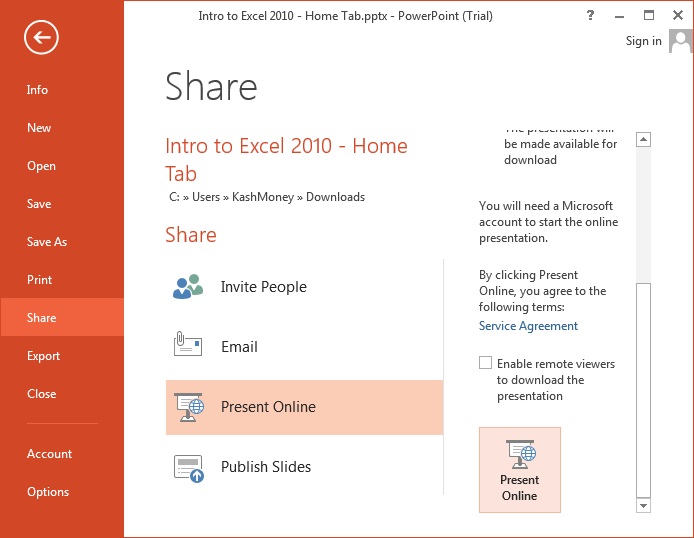
Finally, you can present PowerPoint 2013 slides stored in the cloud on your device to the Web in real time. Other people can also view the presentation remotely, even if they do not have PowerPoint 2013 on their laptops. In this Power point lesson, lets see how you can make this happen. Do the following:
File aka BackStage view > Share > Present Online
Then click on the “Present Online icon”. Next, click “Connect”, and you will be given a link to share with remote viewers once the presentation finishes loading. The link can be used to view the PowerPoint presentation in real time, or for downloading to watch later.
We have shown the above mentioned steps right below for your convenience.
Insert Videos in PowerPoint from the Internet
PowerPoint 2013 also provides you the option to insert images and videos directly from the Web. For this section of MS Powerpoint 2013 tutorial, here are some simple ways to do this. Go to “Insert” and click “Video”. Here you will have the option of adding your own video or finding one using the Bing Video Search. You can even enter in a Video Embed Code. After inserting the video in PowerPoint 2013, you need to click and drag its corner to modify the size. Note that the video can be moved to any location on the slide.
Here is how you can insert a video into your Power Point 2013 presentation.
Insert > Video > Select Bing Video (check steos)

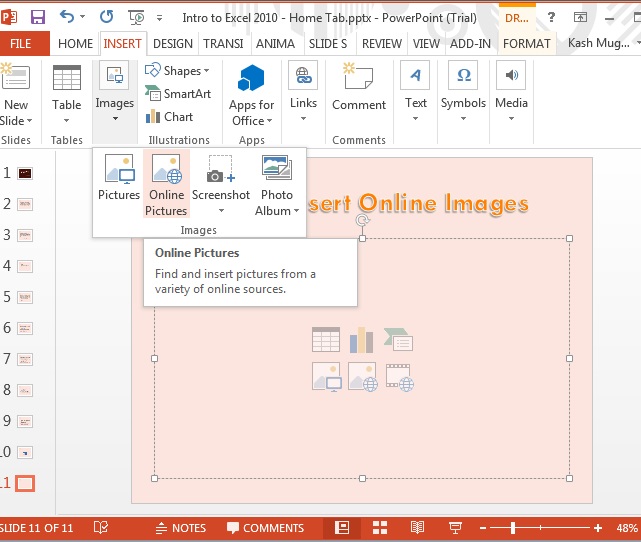
Insert Images in MS PowerPoint 2013
For inserting pictures or images in PowerPoint 2013, you will see 6 icons on each slide for inserting images from the Web. You have to select “Online Pictures”. You can even search form images in the Office 2013 “Clip Art” or do a Bing Image Search. After choosing the picture, click “Insert” and the image will be pasted.
Here are the steps if you want to inserting pictures or images in Microsoft PowerPoint 2013
Insert > Images > Online Pictures
Using Audio for PowerPoint 2013 Presentations
Audio greatly helps to augment the feel of your power point presentation. To add an audio file to Office PowerPoint 2013 presentation, go to the location in the slide where you want the audio to start playing.
Insert > Audio
Lets look at all the different options for Audio next in this Powerpoint 2013 Tutorial
You will find in the top-right corner of the screen. You can choose between Online Audio (sound clips from Office.com), Audio On My PC (stored files on your computer), and Record Audio (create a voice clip on the spot). Select any of these options in PowerPoint 2013 and click “Insert”. An audio bar would be inserted into your slide. This bar will have a button for play/pause, as well as one to go forward or backward on the track. You can even adjust volume from this bar. When you click on the audio box in the slide, Format and Playback tools will come into view on the top navigation bar of PowerPoint 2013. Finally, click “Playback” in MS Powerpoint and select whether the audio should play throughout the presentation. Other options include loop, automatic start, and fade in or out as the slides progress.
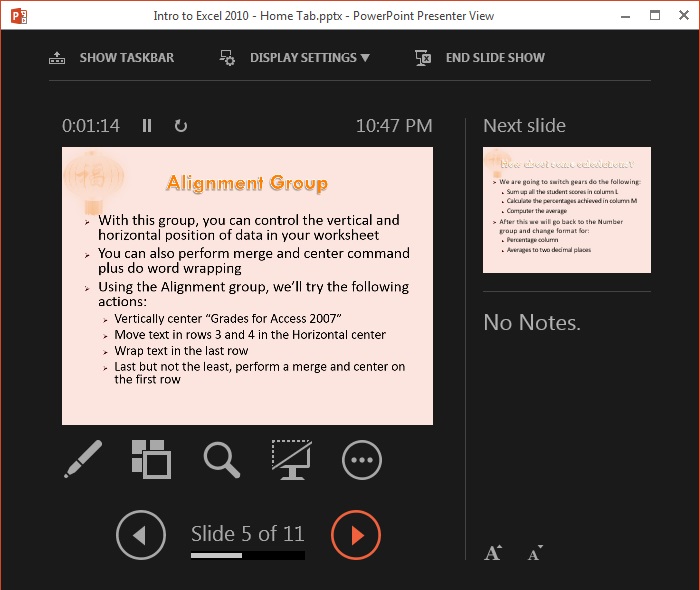
Presenter View in PowerPoint 2013
Another cool feature you have is the Presenter View in PowerPoint 2013. Although this is not a new feature, people apparently didn’t use it that much in the previous versions. One factor that explains this negligence is that you couldn’t open Presenter View if your computer only had one monitor. However, now you can access Presenter View in PowerPoint 2013 even if you have only one monitor. Simply use the combination Alt+F5 to access this feature. Using this view, you can even switch between monitors for Presenter View and Slide Show View. In addition, there is a new Zoom options in PowerPoint 2013 that allows users to fix the viewers’ attention to a particular part of a slide. Not to mention, you can also use a new laser point feature as well. How cool is that?
To sum it up, when you use the new PowerPoint 2013 software, you will not be disappointed. In fact, you will be far more impressed by the new version than Microsoft’s 2010 release after PowerPoint 2007. With impressive options like widescreen and online working tools, PowerPoint 2013 is fit to be used with a variety of devices like tablets and other hardware platforms. All in all, you will find great help in your professional presentations with Microsoft PowerPoint 2013.
We have included a screen shot of Power point 2013 presenter view right below.
Additional Info on MS PowerPoint 2013 Tutorials
- Get started with PowerPoint 2013
- MS PowerPoint 2013 New Features – LearningComputer.com
- How to Topics – MS Office PowerPoint
Connect with US!
![]()