The Mixing Signal Chain: Why EQ Always Comes Before Reverb
Your DAW will let you stack plugins in any order you want. It will not warn you when that order is wrong. And it is one of the few things in mixing that is not a matter of taste there is a reason engineers reach for the same sequence every time.
Here is the standard mixing signal chain order, and more usefully, the logic behind it.
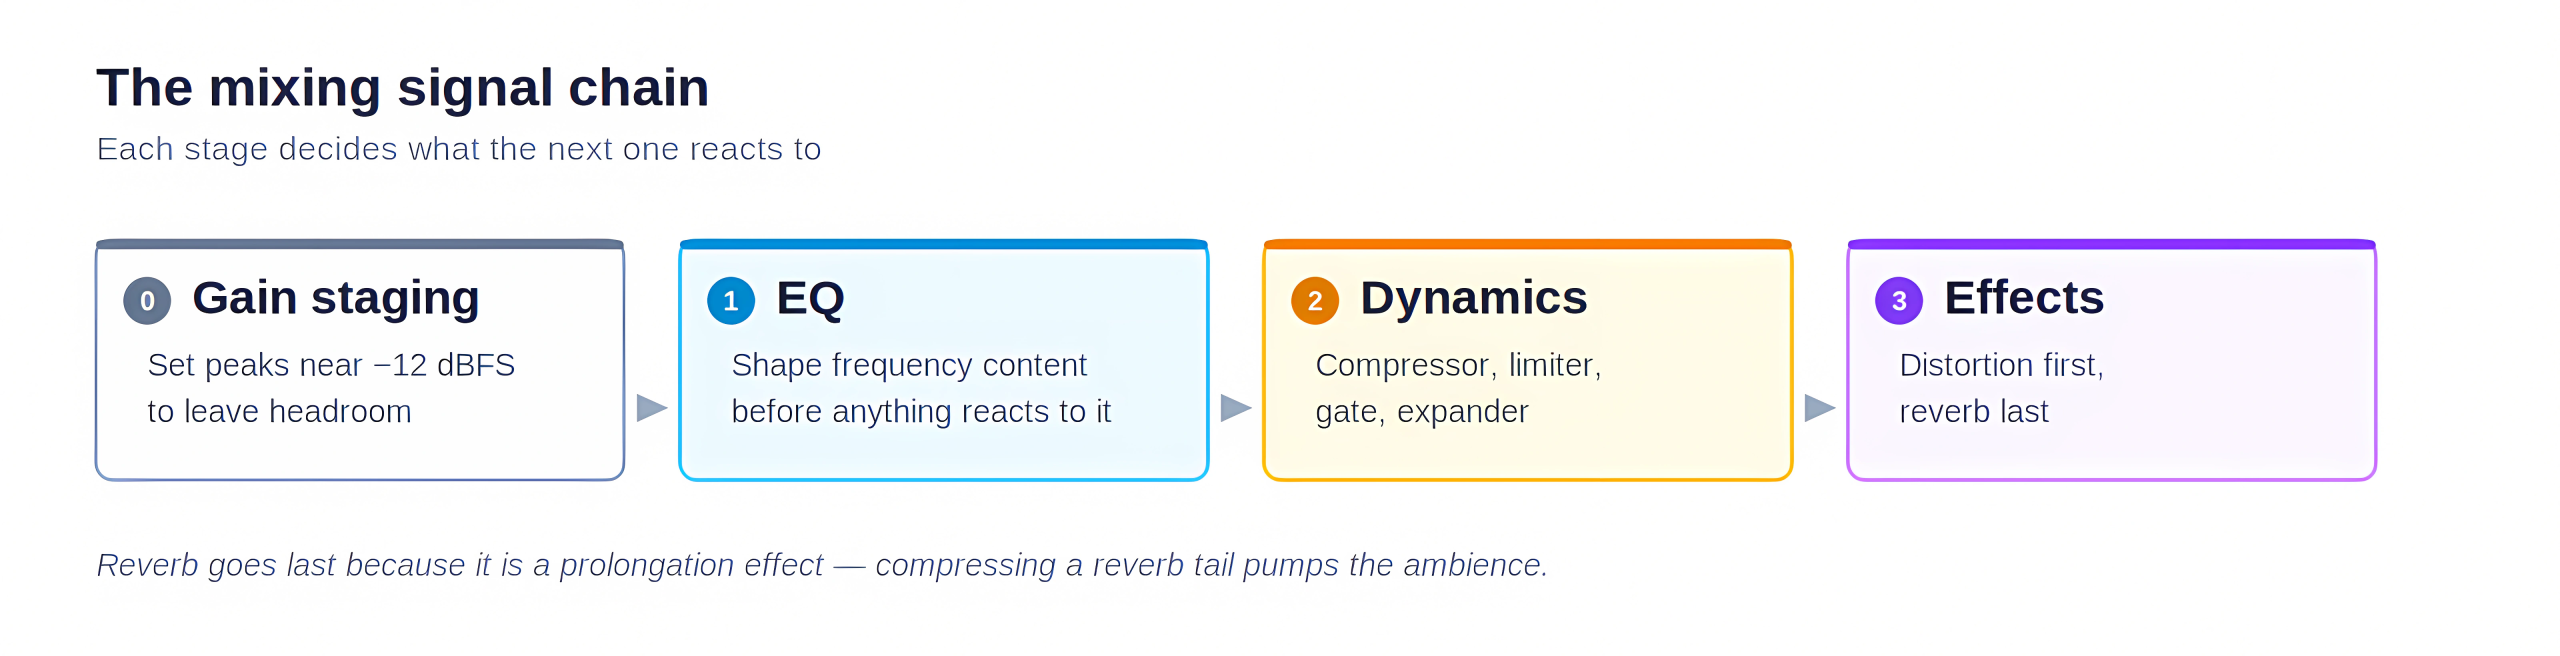
Start With Headroom
Before any processing, get your levels down to around -12 dBFS. That gap between your loudest peak and the ceiling is called headroom, and it is room to work. Every plugin you add can push the level upward, and a signal already flirting with 0 dBFS has nowhere to go but distortion.
The related number is signal-to-noise ratio: the distance between your recording and the noise floor underneath it. A large gap cannot be created after the fact every process that lifts your signal lifts the hiss with it.
1. EQ First
EQ shapes frequency content, and it goes first for a simple reason: everything downstream reacts to what you feed it.
- A compressor responds to the whole signal, including low-end rumble you were always going to remove
- Delete that rumble first, and the compressor only reacts to the part you actually care about
- Leave it in, and you get gain reduction triggered by something that will not survive the mix
2. Dynamics Second
Dynamics processing means anything that manipulates volume over time. The main four:
- Compressor — narrows the distance between loud and quiet parts, then makeup gain raises the whole result.
- Limiter — a compressor with the ratio pinned at maximum. It stops peaks passing a ceiling, preventing clipping.
- Gate — the inverse. Anything below the threshold is cut entirely. Useful for background noise, but a heavy hand strips the room out and leaves the track sounding bare.
- Expander — a gentler gate, reducing quiet material instead of removing it.
The Four Controls That Matter
Compressors vary in character but share the same four parameters.
- Threshold — the level at which the compressor starts working. Lower it and more of the signal is affected.
- Ratio — how hard it compresses. At 2:1, every 2 dB above the threshold comes out as 1 dB, which is gentle. At 20:1, 20 dB becomes 1 dB, which is not.
- Attack — how long the compressor takes to reach full gain reduction once the threshold is crossed.
- Release — how long it takes to stop once the signal drops back below.
Both are measured in time, and together they decide whether compression is audible or invisible. Slow settings let transients through and recover gradually, disguising the processing. Fast settings clamp down and let go quickly, which is why drums are usually treated that way the compression becomes part of the sound.
In practice: set a modest ratio, then lower the threshold until the compressor just begins to react. Shape attack and release from there.
3. Effects Last
Reverb, delay, chorus, and distortion come at the end. Reverb is the clearest case: it is a prolongation effect, a tail that extends past the note. Put a compressor after it and the compressor works on the tail, pumping the ambiance up and down in a way no real room ever does.
The same logic applies inside the effects stage. Distortion goes before reverb: distort a reverb tail and you add harmonics to the room rather than to the instrument. Reverse it and the reverb places an already-distorted sound in a space, which is how the physical world works. An amplifier breaks up, and the room responds to it.
Insert or Send?
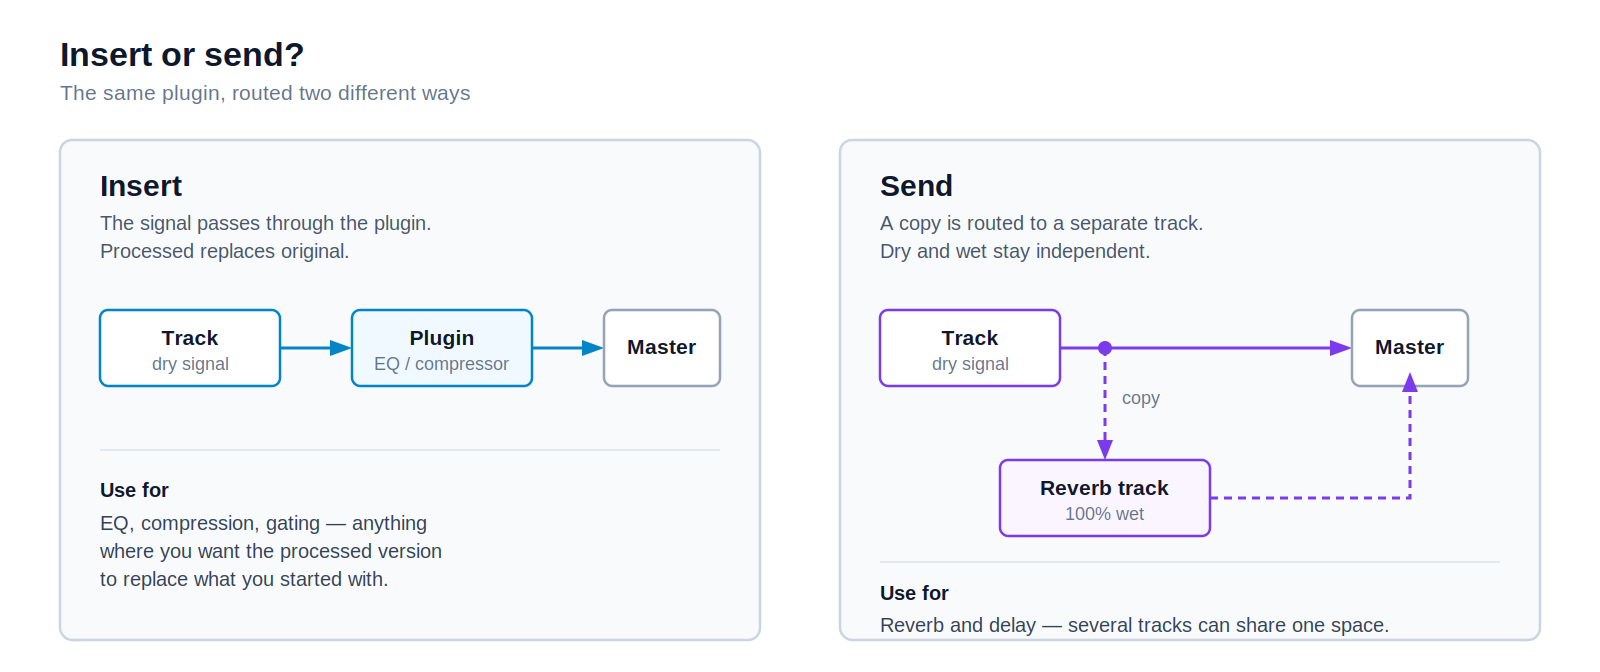
The order above describes the sequence. Routing describes the mechanism, and DAWs give you two:
- Insert — the signal passes through the plugin. Use it for EQ and compression, where you want the processed version to replace the original.
- Send — a copy is routed to a separate track. Use it for reverb, so several sources can share one space and you keep the dry signal under separate control.
Wrapping Up
Gain staging, EQ, dynamics, effects. The order is not tradition, each stage decides what the next one sees, so processing in the wrong sequence means later plugins are reacting to information you were about to throw away.
If you want to try this in practice, our guide to setting up a reverb send in REAPER walks through the routing step by step. For more on the tools behind the work you do, LearningComputer.com publishes free technology tutorials. And if your business needs content that explains things this clearly, Kash Data Consulting builds SEO and digital marketing strategies that put you in front of the right audience. Get in touch to find out how.