How to Add Reverb in REAPER Using a Send Track
You can drop a reverb plugin straight onto your vocal, but that is not how records are usually built. The standard approach is a separate reverb track fed by a send: one reverb can then serve several tracks at once, and you keep independent control over how much of it you hear. Here is how to add reverb in REAPER that way.
Step 1: Create a reverb track
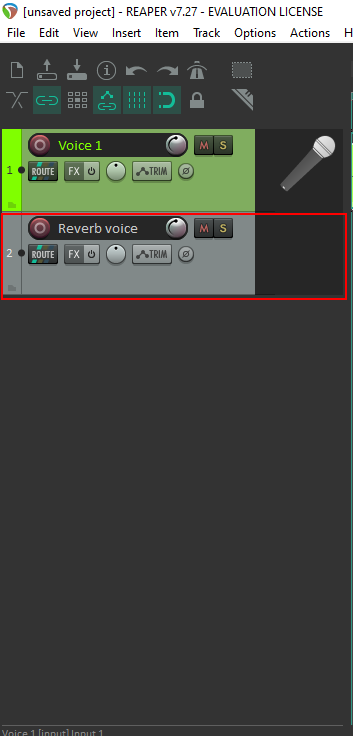
Double-click the empty area of the track list again to make a second track, and name it something obvious. Mine is called Reverb voice.
Step 2: Open its FX window
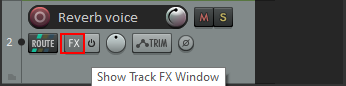
Click the FX button on the new track.
Step 3: Add ReaVerb
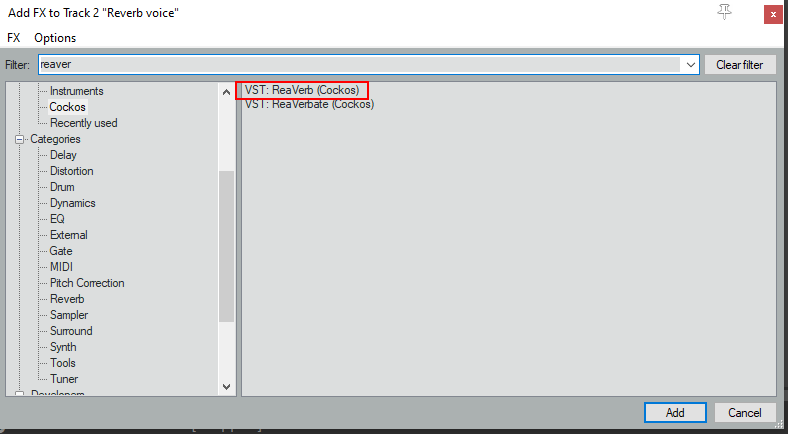
The plugin browser opens. Type reaver into the filter and two results come up: ReaVerb, which is REAPER’s convolution reverb, and ReaVerbate, a simpler algorithmic one. Select ReaVerb and click Add.
Step 4: Pull the dry signal down
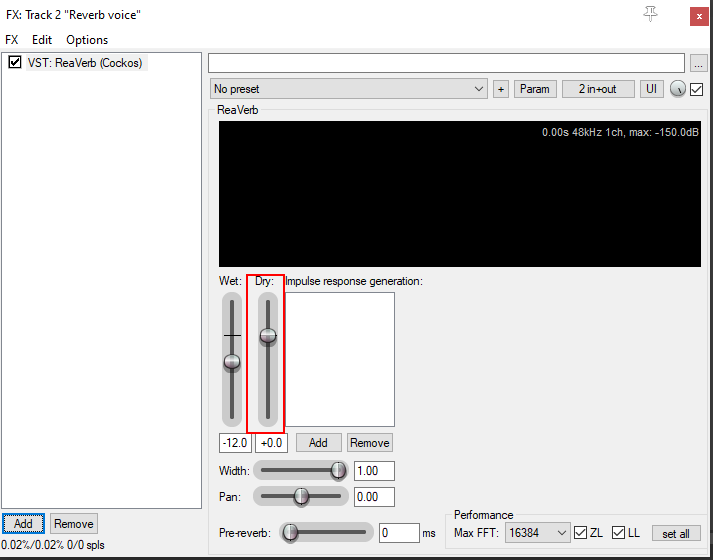
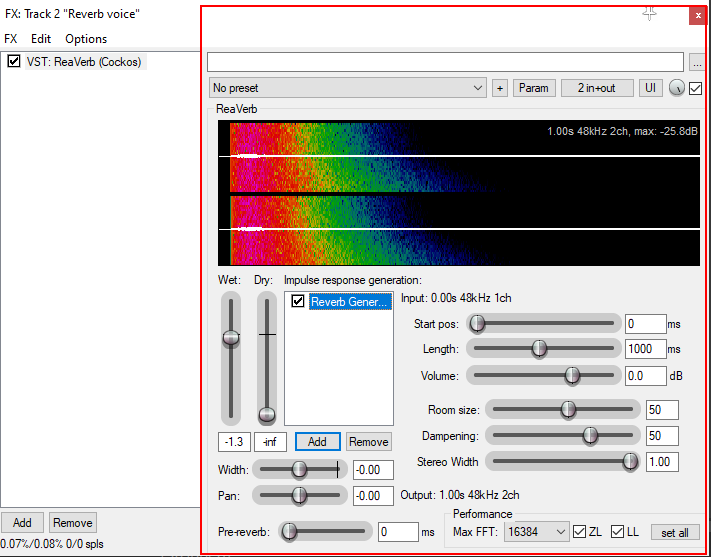
Drag the Dry slider all the way to -inf. On a send track you only want the reverb tail. Leaving a dry signal up means you are hearing a second copy of the original alongside the real one, which makes the track louder and muddier without making it better.
Step 5: Go to the routing panel
Back on your recorded track, click ROUTE.
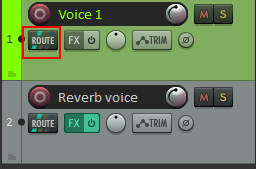
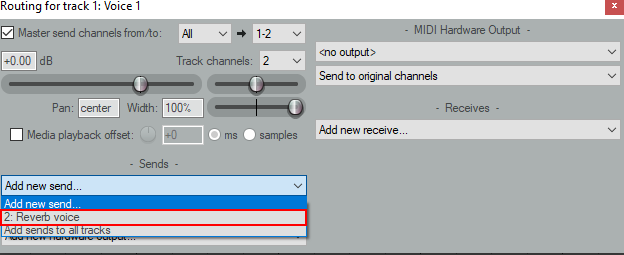
Step 6: Send the track to the reverb
Under Sends, open the “Add new send” drop down and pick your reverb track. Your vocal now feeds the reverb while still going to the master on its own.
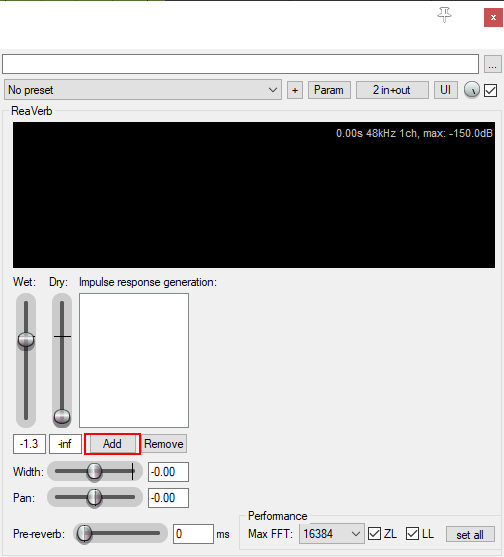
Step 7: Give ReaVerb an impulse
Back in the ReaVerb window, click Add. This is the step most tutorials leave out. ReaVerb is a convolution reverb, which means it recreates a space by using a recording of that space, called an impulse response. With an empty list it produces no sound at all.
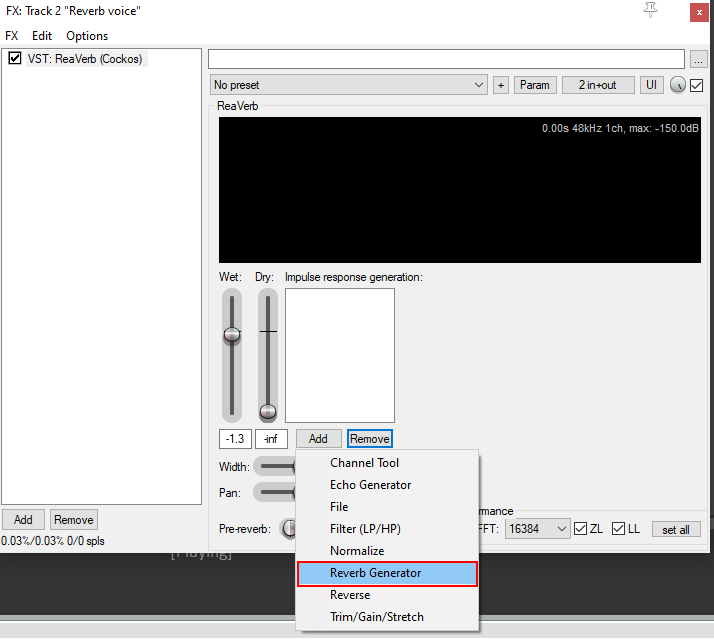
Step 8: Choose Reverb Generator
Pick Reverb Generator from the menu. That tells ReaVerb to build its own impulse response rather than load one from a file, which is the quickest way to a usable sound.
Step 9: Shape the sound
The generator controls appear. Length sets how long the tail rings on, Room size how large the space feels, and Dampening how quickly the high frequencies fade. Adjust until it sits right, then use the send level on your vocal track to set how much reverb you actually hear.
Wrapping Up
That is a proper reverb bus: a dedicated track running a fully wet reverb, fed by a send from your source. Add a second send from another track and both share the same space, which is what makes a mix sound like it was recorded in one room instead of assembled from parts.
For more walkthroughs of the software you actually use, LearningComputer.com publishes free step-by-step technology tutorials. And if your business needs content that pulls people in the way a good tutorial does, Kash Data Consulting builds SEO and digital marketing strategies that put you in front of the right audience. Get in touch to find out how.