
Introduction:
Information Technology has been rapidly changing from last couple of years to have salable and multi OS software’s support. SQL Server is one of them and has been in the market since ages, it only runs on Windows operation system till SQL server 2016. Due to demand in market and the flexibility, Microsoft has introduced (https://blogs.microsoft.com/blog/2016/03/07/announcing-sql-server-on-linux) SQL server Linux in March 2016.
SQL Server on Linux supported platforms:
Below are the supported platforms by SQL server 2017.
| Platform | Supported version(s) | Get |
| Red Hat Enterprise Linux | 7.3, 7.4, 7.5, 7.6, 8.0 | Get RHEL 8.0 |
| SUSE Linux Enterprise Server | v12 SP2, SP3, SP4 | Get SLES v12 |
| Ubuntu | 16.04 | Get Ubuntu 16.04 |
| Docker Engine | 1.8+ | Get Docker |
Linux operating system minimum requirements:
| Memory | 2 GB |
| File System | XFS or EXT4 (other file systems, such as BTRFS, are unsupported) |
| Disk space | 6 GB |
| Processor speed | 2 GHz |
| Processor cores | 2 cores |
| Processor type | x64-compatible only |
SQL server Repositories:
When you install SQL Server on Linux, you can choose online or offline installation. Online installation requires a connectivity to internet and must configure a Microsoft SQL server repository.
There are currently 5 main repositories as below.
| Repository | Name | Description |
| 2019 | mssql-server-2019 | SQL Server 2019 Cumulative Update (CU) repository. |
| 2019 GDR | mssql-server-2019-gdr | SQL Server 2019 GDR repository for critical updates only. |
| 2019 Preview | mssql-server-preview | SQL Server 2019 Preview and RC repository. |
| 2017 | mssql-server-2017 | SQL Server 2017 Cumulative Update (CU) repository. |
| 2017 GDR | mssql-server-2017-gdr | SQL Server 2017 GDR repository for critical updates only. |
SQL server Installation:
Let’s get started installing SQL server on Linux Platform. Before we get started, make sure you have server ready with latest Linux OS in installed on it. To connect to Linux server, you can use remote console or PuTTY or MobaXterm to connect from anywhere. In my case, I am using PuTTY to connect Linux server from my local machine.
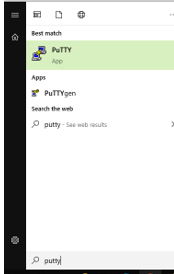
To connect to PuTTY, click on windows icon in the bottom left corner in the system(Windows OS). Once you see a list of apps, type PuTTY and click on that.
Once PuTTY is opened, please provide your IP address in the Host Name ( or IP Address) section to connect to Linux Server. The port number remains the same as 22 and click Open

If the IP address that you have provided is correct, then it would ask you to authenticate by clicking Yes.

This would take you to login screen as below. Provide Login as root ( in my case, use your own user with admin privileges) and password .

You are now successfully established a connection to Linux Server to install SQL server on Linux. Before installing, we need to download repositories of SQL server 2017. Please run the below command to download SQL server 2017 repository.
sudo curl -o /etc/yum.repos.d/mssql-server.repo https://packages.microsoft.com/config/rhel/8/mssql-server-2017.repo

Once you download, the SQL server repository will be placed in your local Linux server to use further. you would see something like below after the successful of SQL server repositories download.

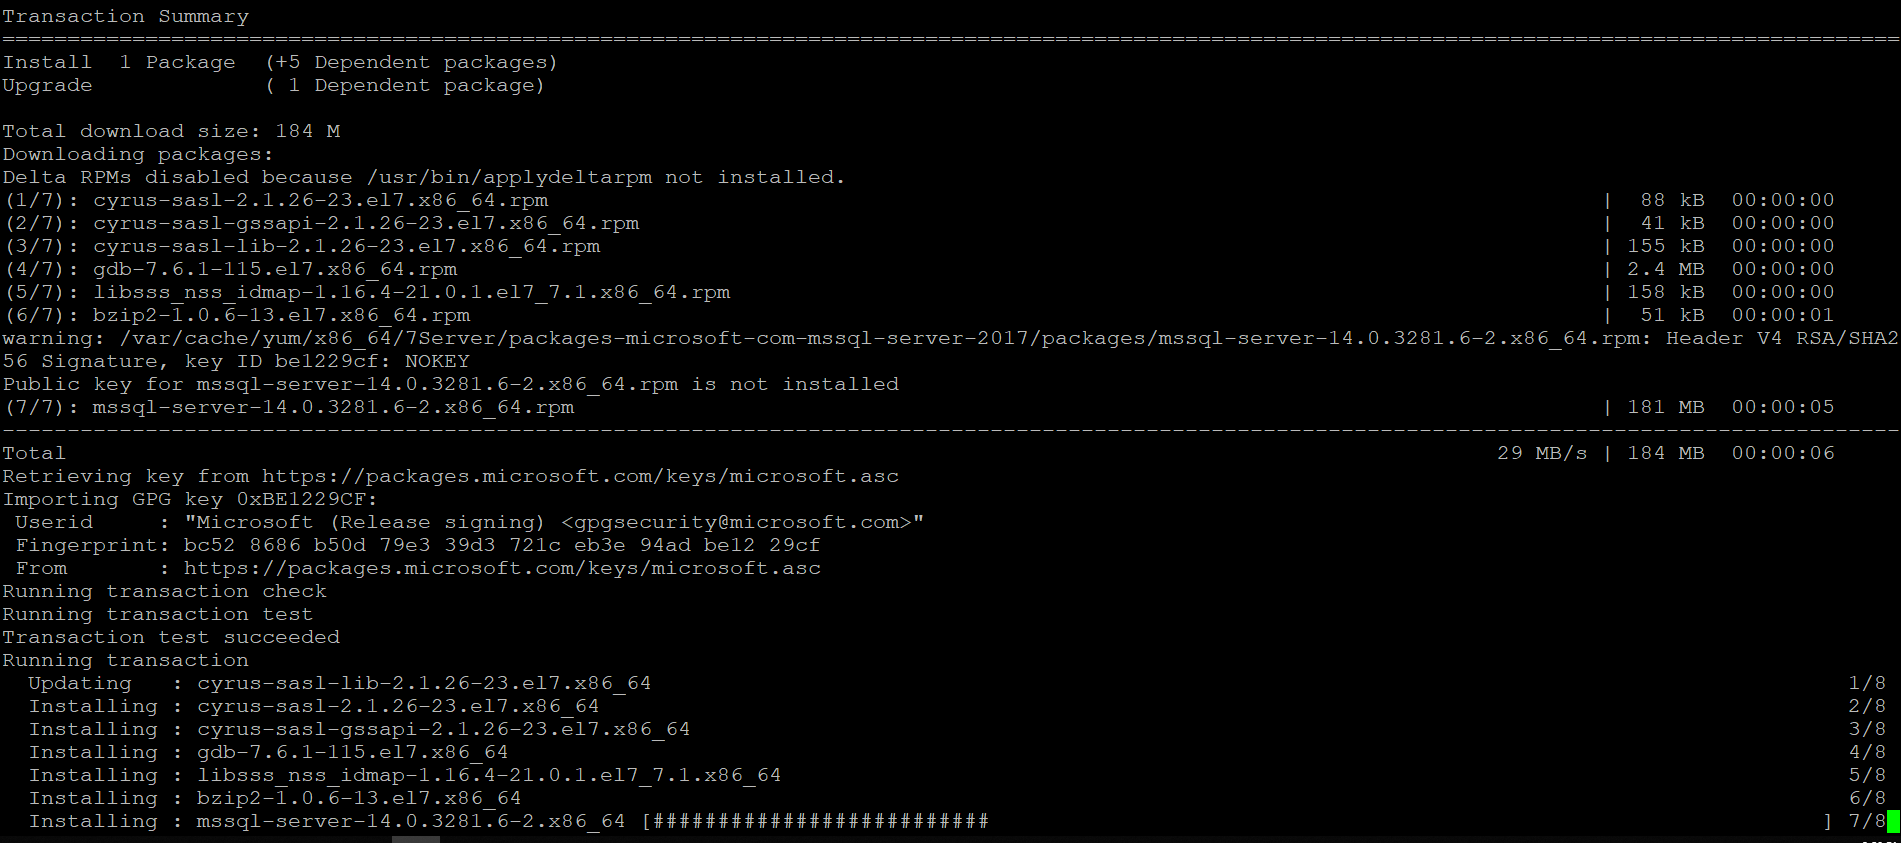
Next, run below command in the SQL server Linux server terminal to install SQL server 2017.
sudo yum install -y mssql-server
![]()
The above command takes time to install SQL server 2017 on your server. The screen would show you the progress something like below.
Once the SQL server 2017 installed, you would see the output as below along with some post configuration guidelines.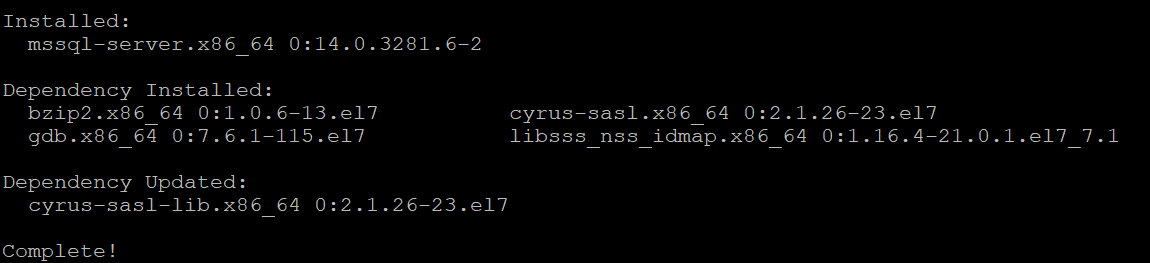
As stated in the above screen, please copy and run the ‘sudo /opt/mssql/bin/mssql-conf setup’ command for SQL server 2017 complete setup.
![]()
In the below screen, select the SQL Server edition that you would like to install from 1 to 8. Select one of the SQL server Edition.

In my case, i have selected 1 as SQL server Evaluation edition and in the next it would ask you for license terms, please click Yes.
![]()
![]()
Set your SQL server SA password when prompted as below also confirm it in the next to proceed further and hit enter.
![]()
![]()
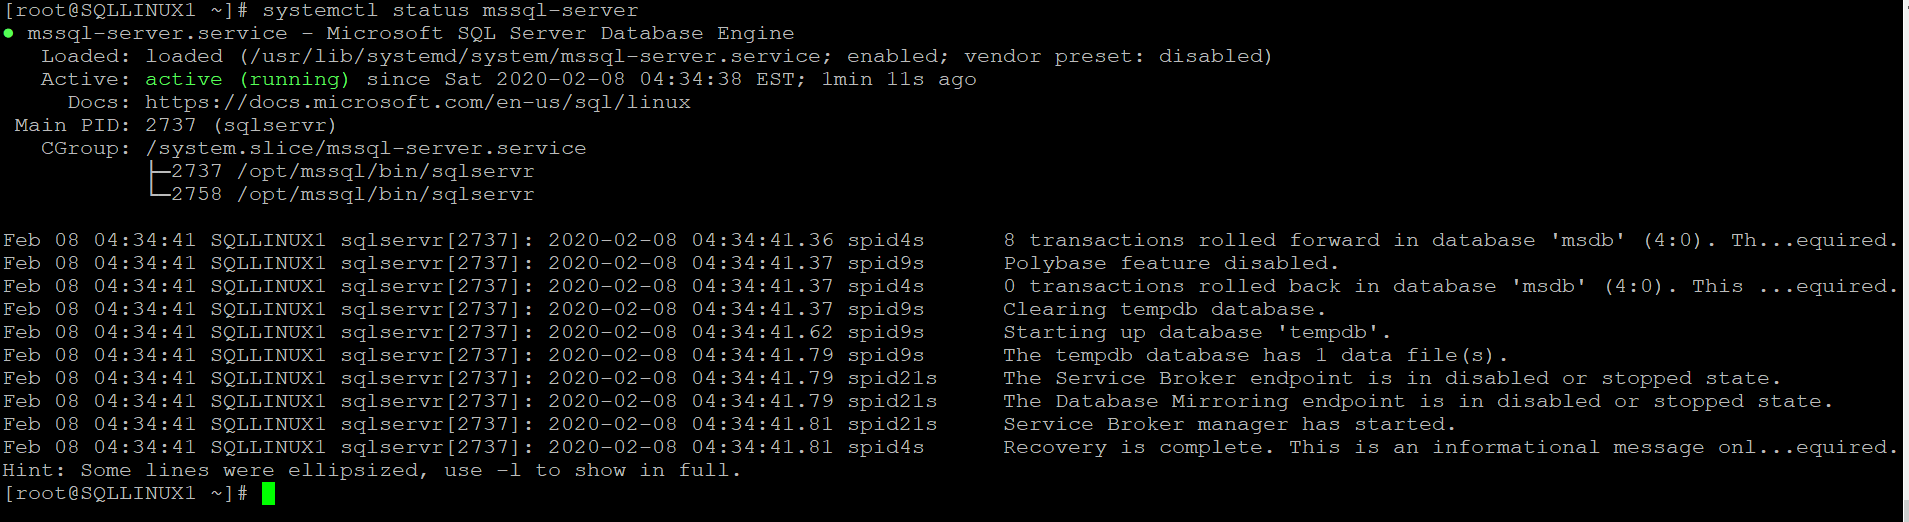
You are all set now, the SQL server is successfully installed and ready to use. Below is the status of it.

To check the status of SQL Sever service status, please run the below command in the terminal.
systemctl status mssql-server
Conclusion:
In this article, we have explored how to install SQL server 2017 on Linux machine using internet. I will explore the offline installation in my next blog.

